Case 2
- Introduction
- Causes of Defects
- Good Practices
- Standards
- Maintenance and Diagnostics
- Remedial
- Similar Cases
- References
Good Practices
Fitting
Design
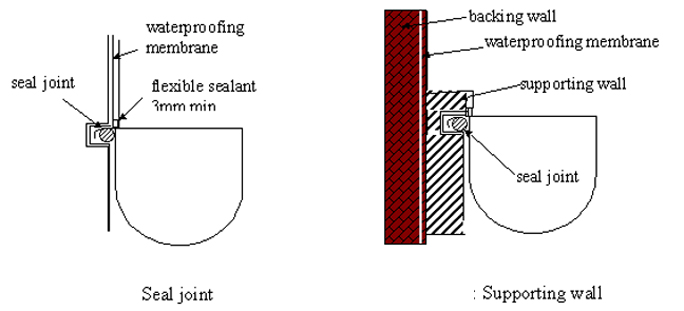
- A seal joint (Figure 1) should be provided to prevent moisture penetration through wall adjacent to the bathtub [1-2].
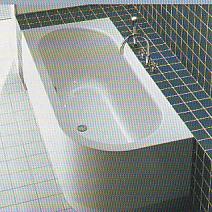
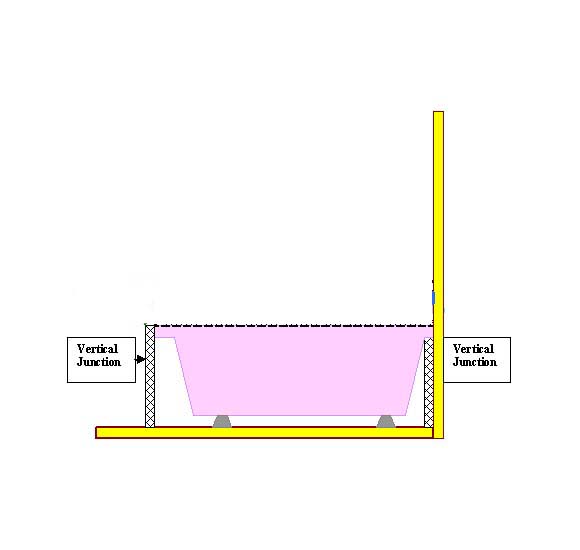
- In addition, it is recommended to fix the bathtub away from wall to minimize chances of water seepage [3] (Figures 2a, 2b).
Construction
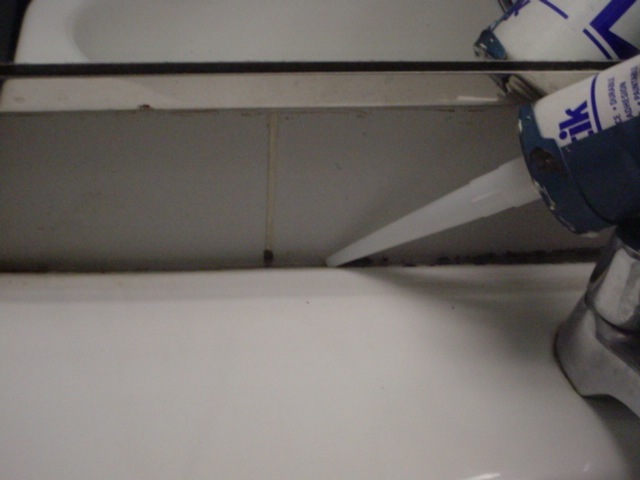
- Sealant should be applied correctly along the tub in order to obtain impervious joints along the wall joint. The gun should be hold at 450 angle and press the tube uniformly while dragging the tube along the joint in constant speed (Figure 3).
Quality Control
- Size of the bath is another important parameter to be considered to minimize water splash over the floor to keep the floor dry, so as to minimize the maintenance [4-5] (see Table 1 in BS 6465). In this case, it is a good practice to enclose the bath area.
- Examine the fitting for damage and ensure satisfactory operation of the fittings prior to use.
Waterproofing
Design
The waterproofing details of bath area are as follows[3, 6-8]:
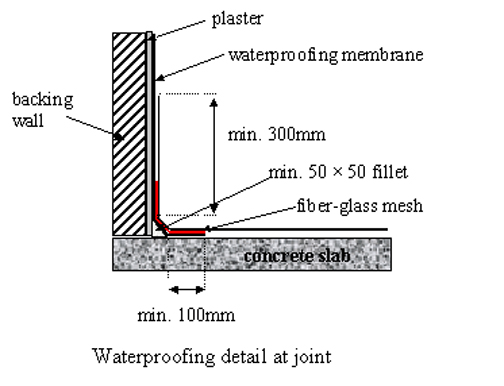
- At the wall joint – minimum upstand 300mm (Figure 4)
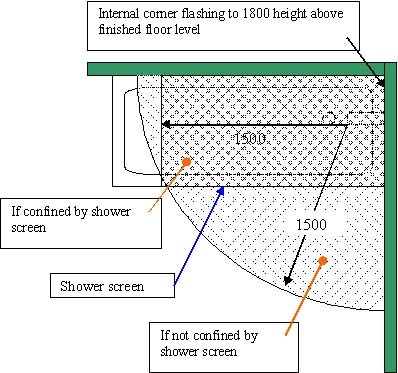
- At walls – up to 1800mm high within a horizontal radius of 1500mm from a shower rose (Figure 5)
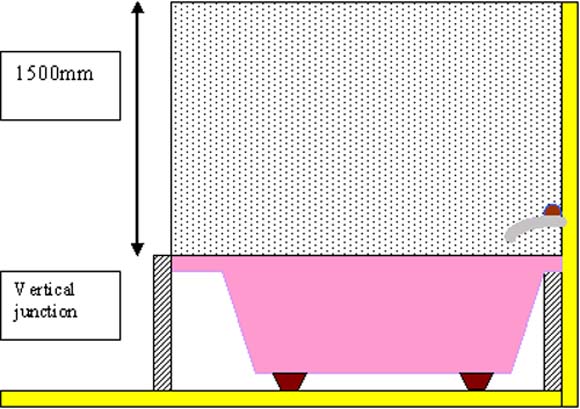
- Where a bathtubs are designed only for bathing, upstand of the membrane can be limited to 1500mm above from shower outlet (Figure 6).
Material
- Select appropriate waterproofing system. Due to wet area’s inherent nature of being small with many penetrations, protrusions and discontinuities, a flexible system is more suitable for internal wet areas.
- In general, the selected waterproofing material should possess the following qualities:
- Suitable to its micro-environment conditions such as ventilation and surface dampness (Table 1)
- Compatible with the other subcomponents such as screed, tile bedding or even type of tiles (in a vertical surface) (Table 1)
- Easy to apply, especially at pipe penetration areas
- Be elastic and able to bridge over cold joints and differing materials
- Have good adhesion and cohesion strengths
- Able to retain its adhesion and remain stable under extreme fluctuations of temperature
- Able to resist mechanical damage such as peeling, cracking and rupture prior to screed finish
- Fully bonded to the substrate so that any leakage may be localised
Check the performance of waterproofing membranes before selecting a suitable system.
| Conditions | Justification |
| 1. Ventilation | Adequate ventilation is necessary for some systems to be cured adequately.
|
| 2. Surface finish (vertical) | System should be able to accommodate (wall) finishes
|
| 3. Surface dampness |
Therefore, in general, solvent-based systems are not suitable while water-based systems are suitable for damp surface conditions. |
| 4. Construction time | Systems that require long curing time is not suitable for limited construction time
|
Table 1: Characteristics of a waterproofing system
- Waterproofing systems selected for use are required to be specified to relevant local building requirements or to International performance standards. These may include subjecting the materials to stringent tests to determine their performance under actual site conditions.
Construction
The waterproofing membrane should be laid appropriately to ensure the watertightness of the system.
The surface should be cleaned or repaired by removing surface contamination or defect to provide excellent bonding property between the substrate surface and membrane (SS CP 82).
Flowing application should be followed up to obtain monolithic structure at the floor trap [6-7].
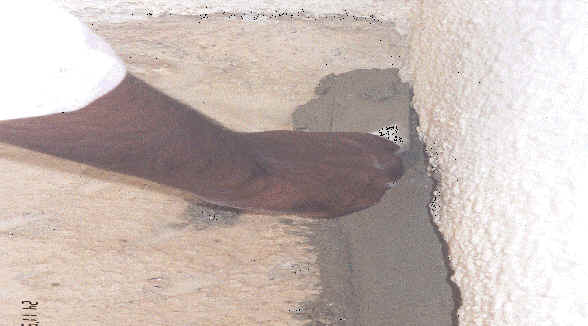
Care must be taken to ensure required coverage around floor traps (Figure 7). Brush application of membrane is more suitable at floor trap to ensure good coverage (Figure 8)
Before application process begins, the substrate receiving the waterproofing membrane should be checked and prepared for better bonding as follows:
Quality Control
- Substrates should be inspected and prepared in accordance to the manufacturer’s recommendations prior to the execution of the waterproofing system.
- Waterproofing products should be sealed and delivered in original packaging. All materials should be protected from the weather and stored in a dry and secure place.
- Greater supervision during construction and a skilled labour force are important so as to control and improve the workmanship quality of a product.
- Checklists for the inspection of waterproofing work can be used as means to inspect the onsite workmanship quality. A continual check should be made on the amount of material that has been used and the area covered to ensure that the recommended coverage rate is being achieved.
- The membrane should be tested for water-tightness after completion of the application. Make sure the membrane has cured properly before carrying on the test (Table 2).
| System | Time |
| Rubber-based systems | 1-72 hrs |
| Acrylic-based systems | 48 hrs for total system |
| Polyurethane systems | 24-72 hrs |
| Cementitious systems | 1-2 hrs and flood test within 24 hrs |
Table 2: Curing Time