Case 2 – tile de-bonding
- Introduction
- Causes of Defects
- Good Practices
- Standards
- Maintenance and Diagnostics
- Remedial
- Similar Cases
- References
Good Practice
Design
Recommend surface treatment and protection in accordance with SS 509-2, BS 8221-2 or equivalent. Ensure proper detailing of window, door, and abutment points where water seepage can occur and cause delamination. Design movement joints are recommended on the structural concrete in accordance with BS 6093 or equivalent.
Construction
Sufficiently remove curing agent (used for early stripping of formwork) to ensure proper adhesion on the substrate. Ensure proper substrate preparation (cleaning) prior to application of plaster/tile finishing. Perform quality workmanship on façade through the correct handling and angle of application to prevent delamination and debonding in accordance with BS 8000-0 or equivalent. Lay adhesive and tiles in the sequence according to the manufacturer’s instructions.
Screed
Design Aspects
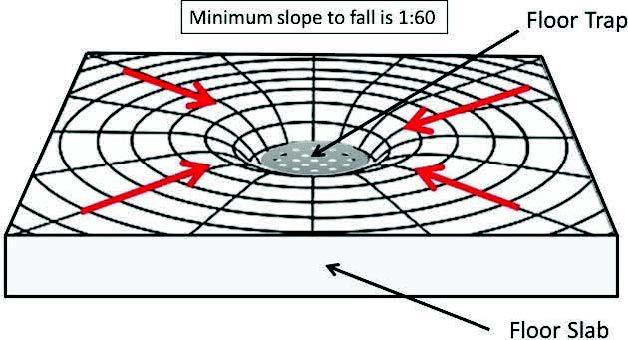
The design of screeds requires careful consideration of fitting the layout in wet areas. In the case of a floor, the required falls and accommodate services for plumbing are required. These include:
(1) Ensuring that the specified gradient of falls is adequate to allow for an efficient drainage of runoff. The directions of the slopes should be clearly indicated in the drawings. The minimum gradient of the fall at shower areas or wash areas should be maintained at 1:60 towards the floor trap.
(2) Determining the thickness of screed by the size of the services that is installed within the screed, as the overall depth of the screed is to be increased by the depth of the particular service accommodated.
Construction Aspects
Substrate preparation
The surface of the substrate should be roughened to form a mechanical key to promote good adhesion. For reinforced concrete walls, the substrate receiving the render should be spatter-dashed with cement/sand (ratio 1:2 by volume) or latex adhesive. The protrusion thickness of the spatter-dash should be about 3–5 mm.
Screed application
Proper application can be achieved through the following:
Planning — Prior to application, the entire wet area surface should be planned to accommodate required levels and falls according to the drawings. Level packs can be used to mark the required level of the screed layer and to ensure the correct falls to the floor outlets.
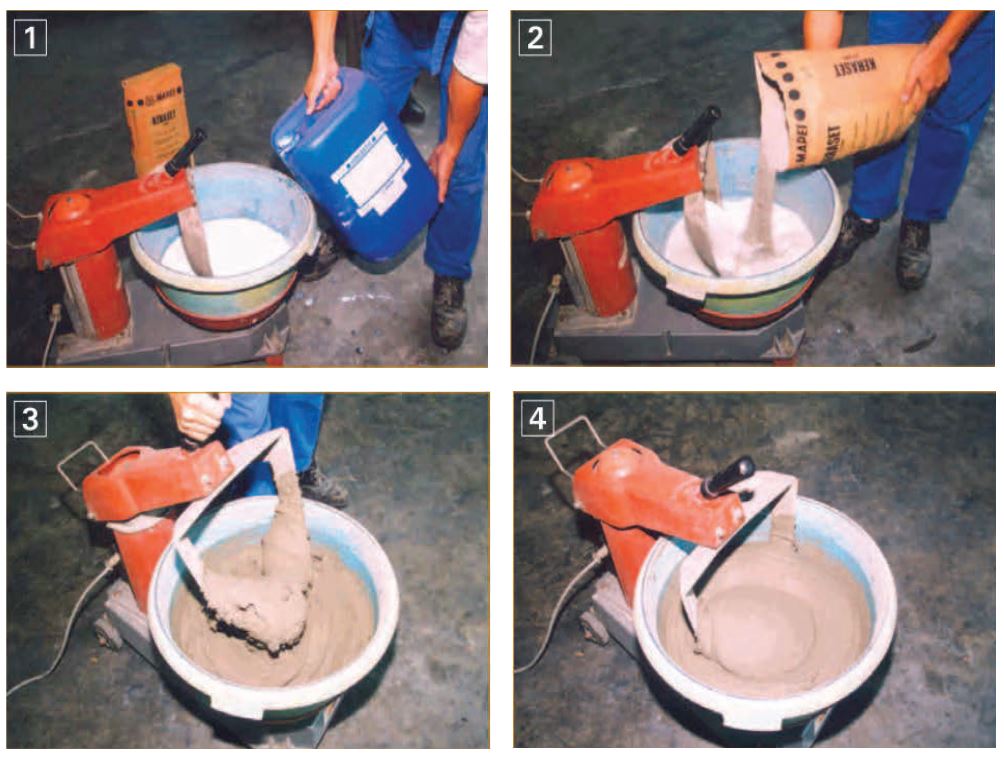
Mixing — To achieve consistency, pre-packed mortar mix is recommended over conventional site mixing of cement, sand and mortar. Pre-packed mortar is a dry product of cement, sand and performance-enhancing additive. Proper mixing of the correct proportion of water and dry mixture should be carried out using mechanical mixers prior to screeding.
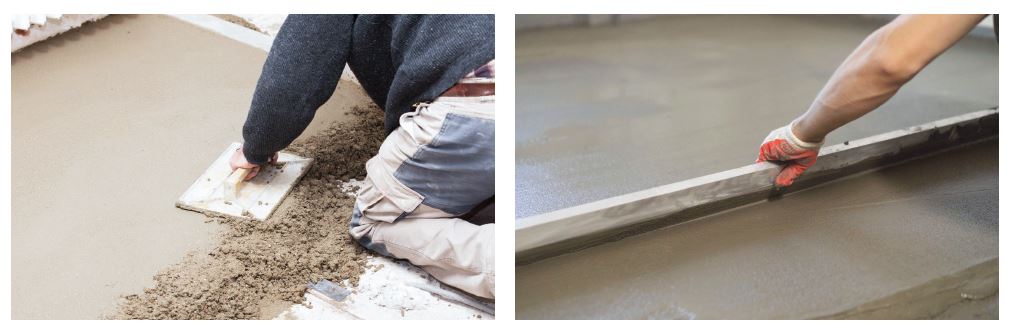
Placing
Laying of the screed should be carried out by spreading a 10–20 mm surcharge over the base surface. The total acceptable thickness should not be less than 50 mm for unbonded screed. Thinner (less than 50 mm) layers may be acceptable with high-quality screeds and sound workmanship. Where thickness is greater than 50 mm, it should be laid in two layers, and each layer should be well compacted to remove voids. The following practices can be followed during the laying of the screed:
A wooden float can be used to roughen the surface to receive the next coat. The recommended curing time for the first coat is 24 hours.
Subsequently, the next coat could be applied in the same manner until the required thickness is achieved. This may be achieved either by setting the timber battens accurately to the required level or by the use of level packs.
To ensure consistency in the surface flatness, the width of the screed bay should be limited to a maximum of 4–5 m.
The layout of the screed bays and joints should be consistent with the movement joints in the structural base or with rigid tile joints.
A plumb or level should be used to check the levelness of the surface.
Curing
The screed should be air-cured for at least seven days to achieve maximum strength. Water may be sprayed during the first two days to facilitate the hydration of cement.
Quality assurance
The following are tolerances for finished surface regularity:
- Floor:
3 mm for tiles to be fixed with adhesive
5 mm for tiles to be fixed with cement sand and mortar
10 mm for tiles to be fixed with cement and sand semi-dry mix - Wall:
3 mm for tiles to be fixed with adhesive
6 mm for tiles to be fixed with cement sand mortar
See Reference [2] for further details including the design/construction/maintenance of tiling works.