Case 1
- Introduction
- Causes of Defects
- Good Practices
- Standards
- Maintenance and Diagnostics
- Remedial
- Similar Cases
- References
Good Practices
Design
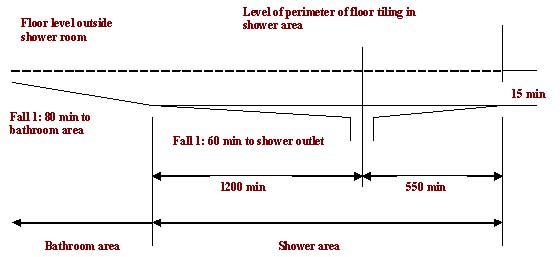
Use screed, preferably locally green certified to provide protection to the waterproofing membrane and construct the slope for drainage. Provide adequate thickness to embed the service pipes by at least 20 mm. For thicker screed, coarse aggregates of a smaller size should be used. Increase drop in cases where the layout requires soil pipe to be embedded in the screed, to maintain a minimum screed depth. Gradient of falls specified should be adequate to allow for efficient drainage of runoff. The minimum
gradient of the fall at shower areas or wash areas should be maintained at 1:60 towards the floor trap.
Construction
Ensure quality control of workmanship in accordance with BS 8000-0 for proper pouring, curing and compaction. Concrete floors should be air-dried for a minimum of 4 weeks after curing. Slope should
be maintained using a series of spot levels. Special attention should be given to the installation of all penetrations and movement joints. The pipes embedded in the screed should be checked for proper layout and jointing. Carry the movement joints in the structural slab through the screed in accordance with BS 8204-1 or equivalent.
Screed
Design
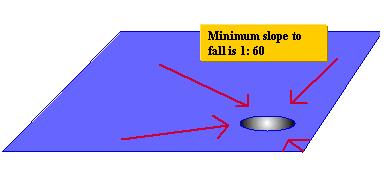
- Gradient of falls specified should be adequate to allow for drainage of runoff. Generally, minimum slope 1:60 in wash areas and 1:80 in other dry areas should be kept towards the floor trap (Figure 1).
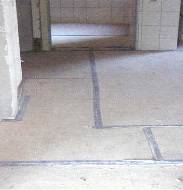
- The directions of slopes should be clearly indicated in the drawings (Figure 2).
- Floor trap should be located closer to the water source to minimize the water from affecting the whole area of floor.
Construction
Flowing steps can be followed up to observe good leveling during screed laying:
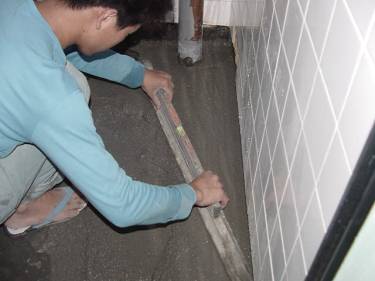
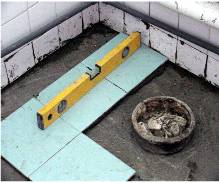
- The entire wet area surface should be planned to accommodate required levels and falls according to the drawings. Level packs can be used to construct the required level of the screed layer and to ensure the correct falls to the floor outlets (Figure 3).
- Laying of screed must be carried out by spreading 10-20mm surcharge over the base surface. If the thickness is greater than 50mm, it should be laid in two layers and each layer should be well compacted to remove voids.
- To ensure consistency in the surface flatness, the width of the screed bay should be limited to a maximum of 4-5m.
- A plumb or level should be used to check the levelness of the surface.
Quality Control
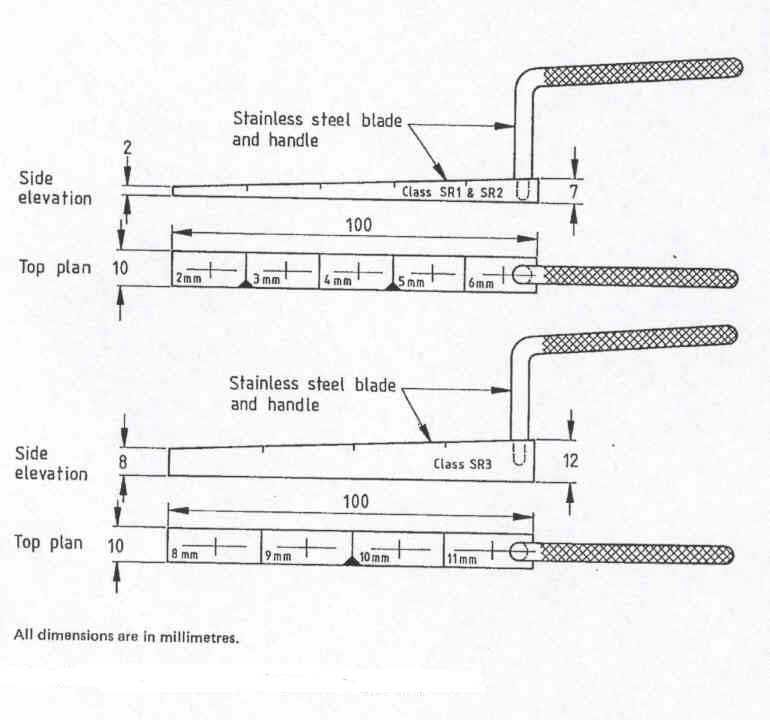
- The surface regularity should be checked using slip gauge (Figure 4) to ensure that the finished surfaces are within the following tolerances:
- 3mm for tiles to be fixed with adhesive
- 5mm for tiles to be fixed with cement sand and mortar
- 10mm for tiles to be fixed with cement and sand semi-dry mix
Tiling
Construction
Following good practice can be used during the application to obtain neat and level surface:
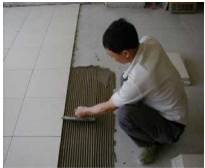
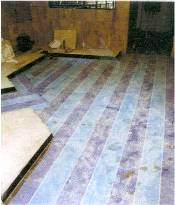
- The mortar should be applied to a consistent thickness of not more than 10 mm and should not be spread over a coverage that could not be covered with tiles in time as the surface of adhesive may form a skin which prevents bonding (Figure 5).
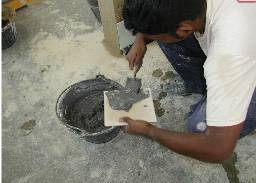
- The background of the tiles should be cleaned thoroughly (Figure 6).
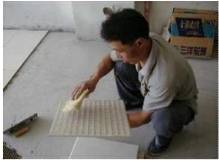
- Mortar should be spread on the cleaned background of the tile. The keys and frogs on the tile back should be completely filled up with mortar, with a thickness of not less than 2 mm but not more than 6 mm exceeding the depth of keys or frogs (Figure 7).
- The tiles should be then placed firmly with a twisting motion (don’t slide tiles in), ensuring regular and straight joints to a recommended width. Once they have been put in position, they should be uniformly tapped using a hammer into place to achieve good contact. A block should be used to prevent over-hammering that will chip or crack the tiles (Figure 8).
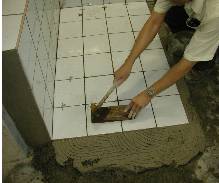
- Spirit levels should be used to check surface levelness and evenness during tile installation and after fixing (Figure 9). For bigger size tiles, a further check of levelness can be carried out about 2 to 3 hours after laying because of the possibility of tile settlement due to self weight.
Protection to the tilling works by covering the tiled area with polyethylene sheets (Figure 10); cardboards or wooden boards (for heavy traffic) (Figure 11) should be provided immediately after its completion until the entire system has cured. These protective materials should be sufficiently thick to withstand human traffic, abrasion, and impact, and be impermeable to water and would not stain under wet and dry conditions.
Ventilation
Design
Adequate ventilation should be provided to enhance the drying process. Proper air circulation can be designed by natural, mechanical or a combination of both mechanical and natural ventilation systems in which minimum air change per hour (ACH) should be 10. However, if entirely mechanically ventilated systems, minimum ACH should be 15.