Case 1
- Introduction
- Causes of Defects
- Good Practices
- Standards
- Maintenance and Diagnostics
- Remedial
- Similar Cases
- References
Good Practices
Dampness
Design
The material selection for exposed surfaces, and their regularity and surface texture should be detailed to
prevent moisture retention. Areas prone to high moisture exposure shall be made impervious with adequate waterproofing systems. Also such surfaces should be without impediments (e.g. built-in cabinet, fixed equipment/services) to ensure access for inspection and to ensure ease of cleaning. Access for adequate cleaning should be provided in accordance with BS 8221- 1, SS 509-1 or equivalent. Ventilate to prevent moisture retention on floor/wall/ceiling. For natural ventilation, opening > 5% of floor area. For mechanical ventilation, air exchange rate > 20 air changes per hour, in accordance
with “CP on Environmental Health”.
Construction
Exterior surfaces of porous building material (e.g., cellulose, brick, stone, cement rendering) can develop biological growth. Avoid such growth as much as possible with treatments of anti-algae/anti-fungus solutions and allow to dry before painting/repainting (SS 652: B.5.2.1). Improve ventilation and remove sources of dampness to dry out the substrates as thoroughly as possible during painting works in
accordance with BS 6150, SS 542 or equivalent. Ensure access ducts are connected to the mechanical
ventilation system. The exhaust system shall dispel the air directly outdoors.
Ceiling Finishes
Material
Materials used for ceiling boards in wet areas should have a level of resistance against any bacterial growth.
Plumbing
Construction
Correct fixing of the pipe joints is important to provide the water-tightness. Following basic practices can be useful when fixing [1-3]
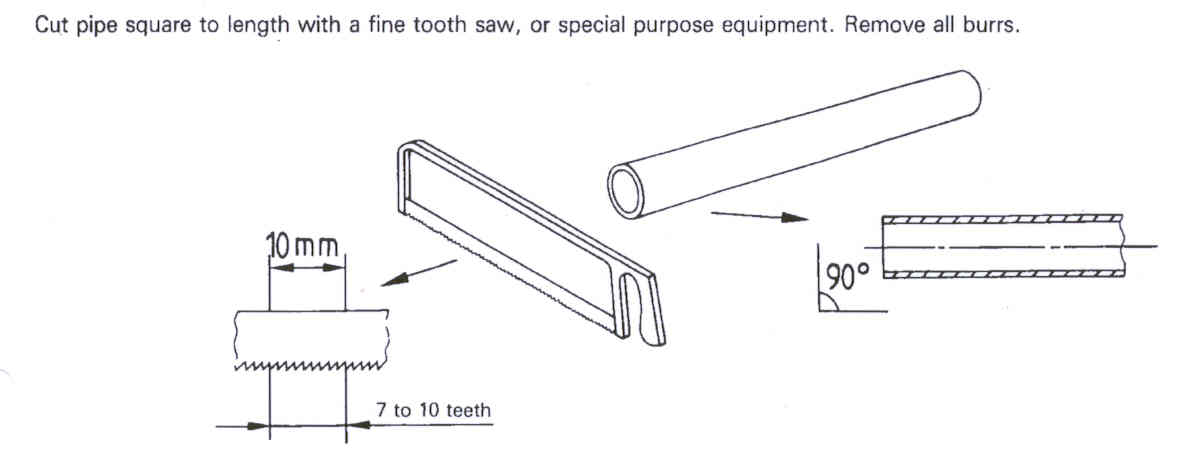
- When the pipe has been cut to joint, it is necessary to remove all the rough burrs before fixing the joint (Figure 1). The surface should also be cleaned with wire wool. Chamfering of the edge of the pipe and socket using a file should be carried out approximately to 150 and 450 angles for better fixing.
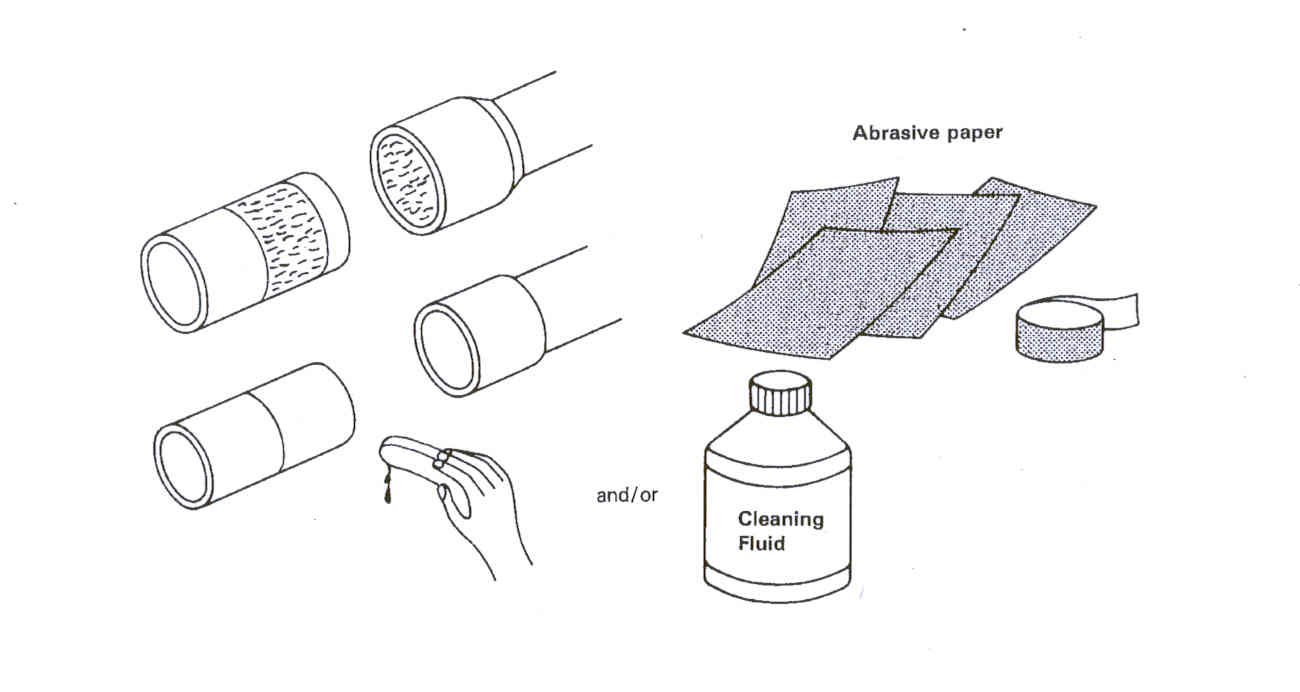
- With most types of glue or solvent, it is necessary to use a cleaner (Figure 2). This will remove any impurities that may be on the surface of the pipe or fitting.
- Plastic pipes can be jointed with either solvent cement or compression fittings and ring seals. The method of jointing normally depends on the materials and size of the pipes (see Table 11, BS 5572: 1978 and Table 1, ISO Technical report 7024).
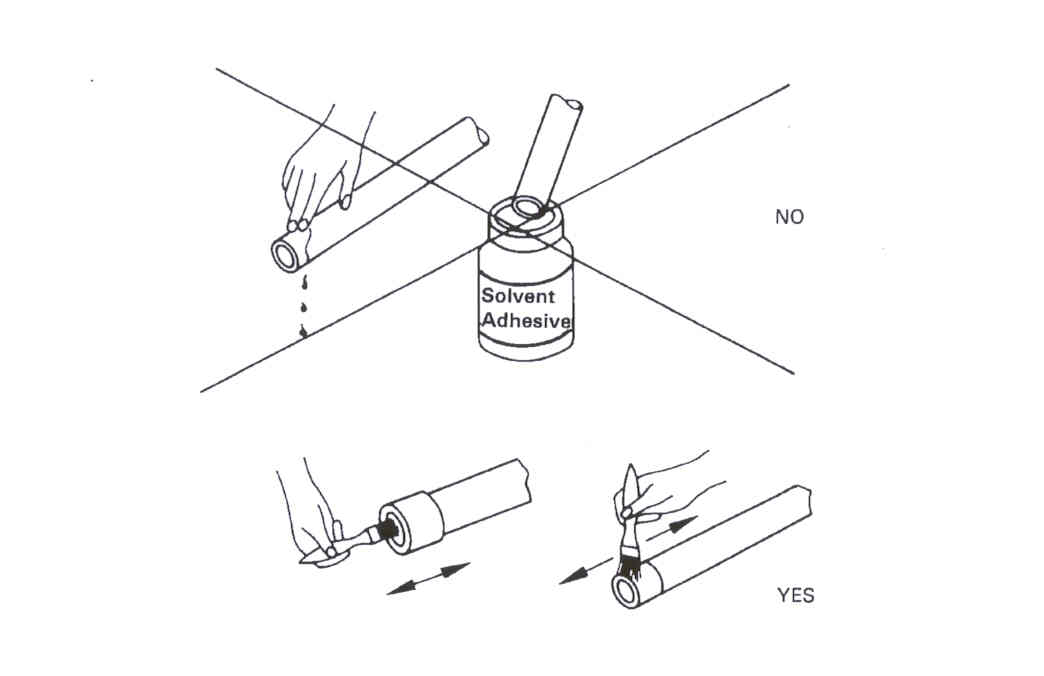
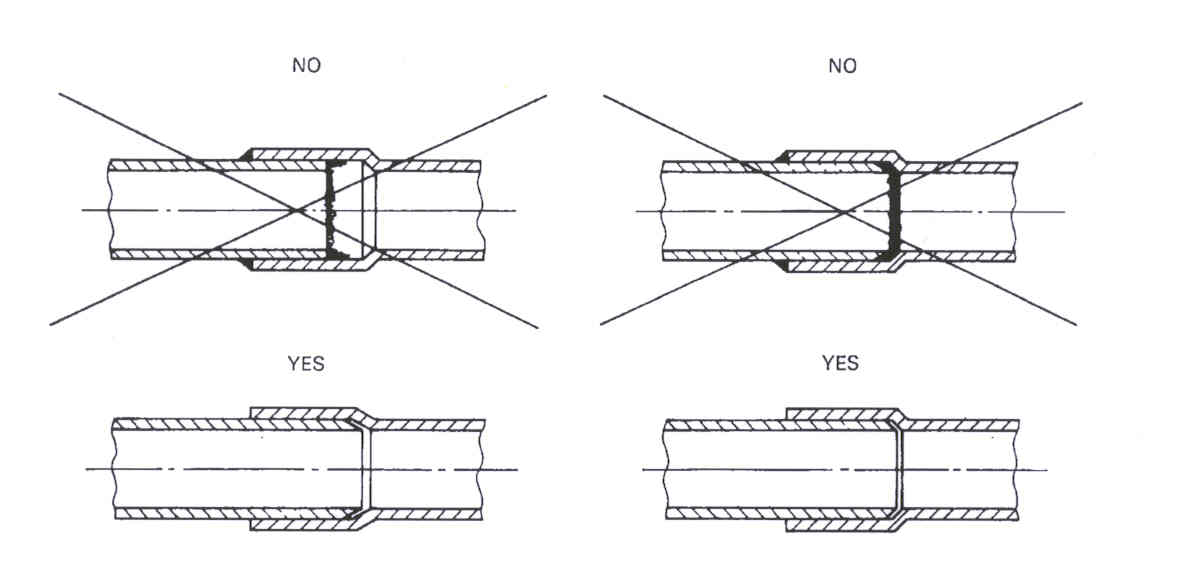
- Instructions given by the manufacturer should be followed when using solvents. Generally, it should be applied to both surfaces of the pipe and the socket to which is attached, and fit the two parts together quickly (Figure 3a & b). It is important to mark down the actual final position before applying the solvent as it sets in position very quickly.
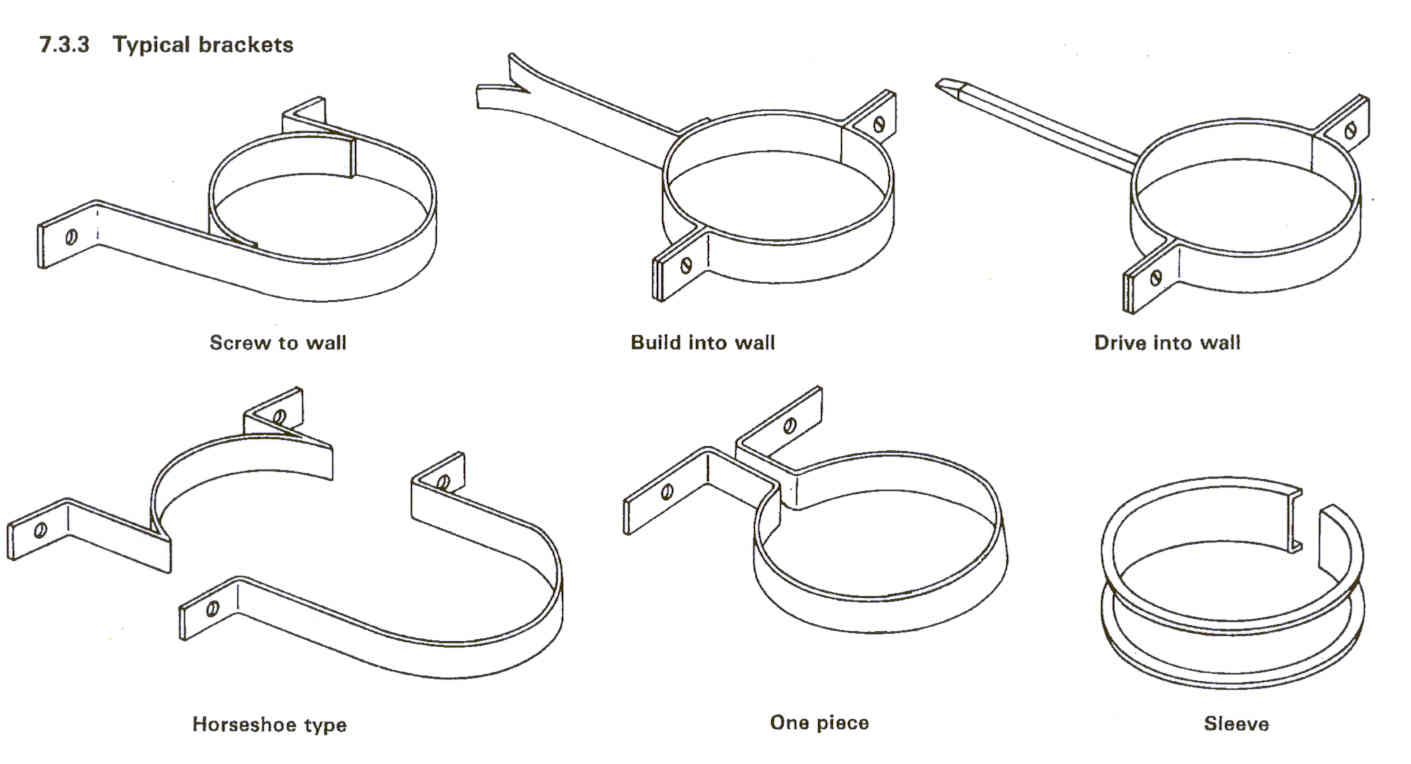
- Plastic pipes should be fix according to the relevant allowances for movement, providing either sliding supports for locations or rigid fixing for clamping (Figure 4) at intervals not exceeding the maximum spacing given Table 1 [2-4].
| Maximum distance between sanitary pipe supports | |||
| Pipe material | Pipe size (mm) | Vertical pipes (m) | Low gradient pipes (m) |
| Plastic pipes | 32 – 40 | 1.2 | 0.5 |
| 50 | 1.2 | 0.6 | |
| 75 – 100 | 1.8 | 0.9 | |
| 150 | 1.8 | 1.2 | |
| Cast Iron | All sizes | 3.0 | 3.0 |
Table 1: Minimum spacing for pipe support
Quality Control
When all the pipe work is completed, and the solvent has completely cured, introduce a full pressure test on the pipe work to ensure that there are no leaks from the joints before starting to use or embedded into the concrete.