Case 1
- Introduction
- Causes of Defects
- Good Practices
- Standards
- Maintenance and Diagnostics
- Remedial
- Similar Cases
- References
Good Practices
Concrete
Ensure a good mix of dense concrete in order to improve durability. This has to be achieved at various stages in the process.
Design
- Specifying a dense concrete with minimum water-cement ratio.
- Ensure that the concrete mix is appropriate and to the specifications specified. Suitable grading of all suitable materials combined to provide the least amount of voids.
- Sufficient cover to reinforcement must be maintained.
Construction
- Efficient and accurate batching and mixing of fresh concrete for transporting to site without any delay to retain suitable workability.
- Full compaction of fresh concrete at earliest possible time with appropriate methods without further disturbance to the fresh in-situ concrete.
- Preventing premature stripping of the formworks and loading of the structural elements.
- Reinforcement can be protected further by using following methods:
- removal of rust and mill scale before embedment
- use of non-metallic coatings such as epoxy coatings
- use of metallic coatings such as Zinc and Nickel
- Cathodic protection
- use of corrosion inhibitors.
- use of corrosion resistance reinforcement (eg. stainless steel)
- use of low permeability concrete, with improved resistance to chloride ion ingress
- Pipes and pipe sleeves should be cast with the floor slab rather than leaving openings or hacking after concrete has cured, to minimize water leakage caused by porous concrete around it.
Quality Control
- Check for quality of concrete before placing (SS 78). e.g. water-cement ratio, slump test, etc.
- Check for correct concrete cover thickness.
Waterproofing
Design
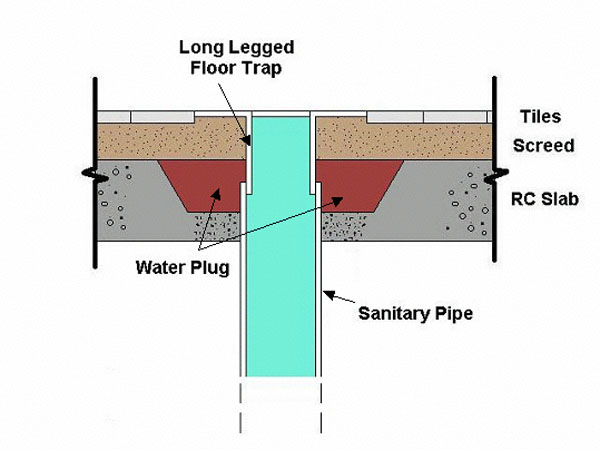
Proper design details of waterproofing at pipe penetration should be provided. Following are the details (Figure 2).
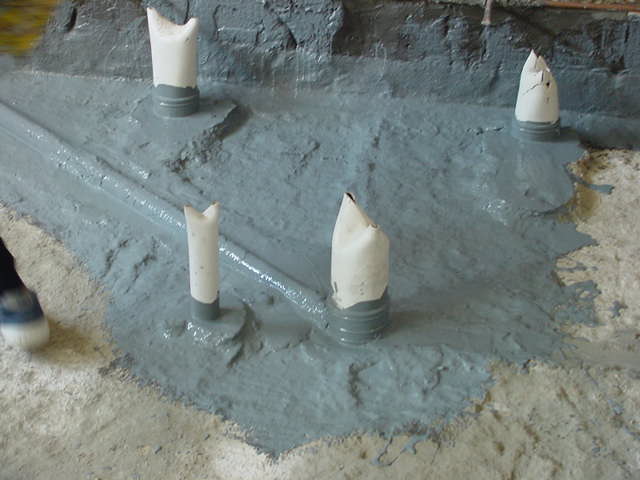
Water plug can also be used around the pipe penetration to improve the water tightness of the system as shown in Figure 3.
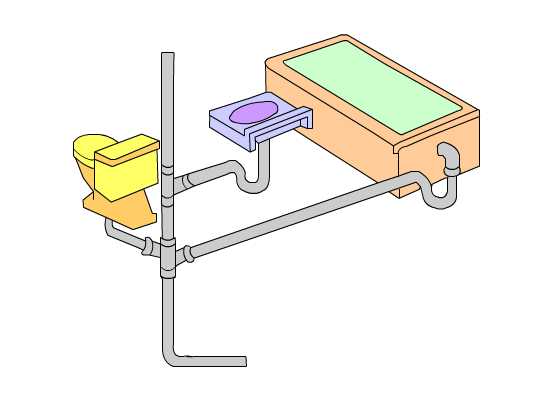
However, it is a good practice to have minimal number of penetrations (Table 1) to minimize the inhomogeneity of the waterproofing membrane. By designing a common stack, the number of penetrations can be minimized (Figure 4).
| Fittings | Recommended number of penetrations |
| Urinal/WC | 1 trap shall be provided to serve a maximum of 10 urinals. For more than 10 urinals, more than one trap shall be provided. |
| Washbasin | 1 wash basin trap shall be provided to serve a maximum of 10 wash basins. For more than 10 wash basins, more than one trap shall be provided. |
| Wash/shower/bath | 1 floor trap for every 3 WC cubicles provided that the separating wall/ partition does not touch the floor level and the other 2 WC cubicles are graded to fall towards the floor trap (FT) in the third WC cubicle. |
Table 1: Recommended number of penetrations for different sanitary fittings
Construction
The waterproofing membrane should be laid appropriately to ensure the watertightness of the system.
Substrate preparation for application is very important in this process to obtain excellent water-tightness. The following good practices can be carried out:
| Surface of the concrete slab should be checked for surface defects after casting. These defects should be removed and repaired to achieve the flatness for waterproofing. This is to ensure excellent bonding between the substrate surface and membrane [17]. | |||||
| When the surface has imperfections like honeycombs and defective concrete, it should be repaired or removed down to sound concrete and patched up with suitable mortar such as shrinkage compensated grout, polymer-modified mortar, epoxy mortar etc.
If the surface contains any greasy or oily contaminants, both chemical and mechanical cleaning can be used to remove them. | |||||
 | |||||
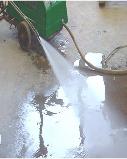
| Finally, surface should be cleaned to remove debris and dirt. Some cleaning methods include high-pressure water jet, cleaning with vacuum cleaner or with brooms. | |||||
 |  |  | |||
 Excess water should be removed to provide dry surface for waterproofing application. Blowers can be used to dry the surface faster. Excess water should be removed to provide dry surface for waterproofing application. Blowers can be used to dry the surface faster. | |||||
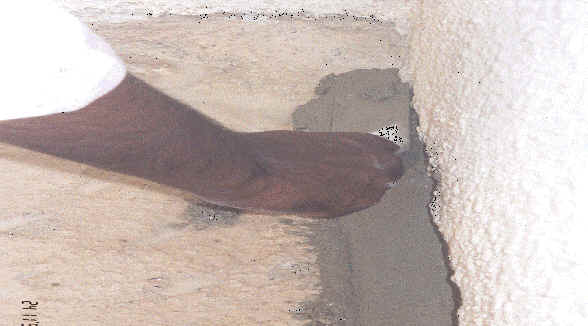
| Fillet is constructed along the joint as a bond breaker at discontinuities such as joints to accommodate the relative movement of abutting elements. | |||||
 |  | ||||
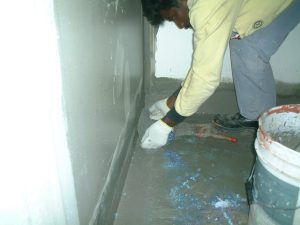
Finally, the application of membrane should begin at a corner: diagonal to the entrance, and upturns at wall floor junctions, to avoid stepping on applied area. To minimise water leakages in wet areas, it is a good practice to cover the entire floor area with waterproofing membrane. | |||||
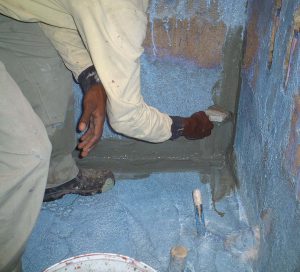 |  | ||||
| In the process of application, rollers or brushes can be used in most of the locations. Use of rollers with the same width as the upturn provides an even and uniform application. However, critical locations such as pipe penetrations and joints, could be applied using a brush to ensure good coverage. | |||||
 |  | ||||
| A fiberglass mesh should be used at joints to accommodate the relative movement of abutting joint and to minimize the risk of tearing the waterproofing membrane. | |||||
Quality Control
- Substrates should be inspected and prepared in accordance to the manufacturer’s recommendations prior to the execution of the waterproofing system.
- Waterproofing products should be sealed and delivered in original packaging. All materials should be protected from the weather and stored in a dry and secure place.
- Greater supervision during construction and a skilled labour force are important so as to control and improve the workmanship quality of a product.
- Checklists for the inspection of waterproofing work can be used as means to inspect the onsite workmanship quality. A continual check should be made on the amount of material that has been used and the area covered to ensure that the recommended coverage rate is being achieved.
- The membrane should be tested for water-tightness after completion of the application. Make sure the membrane has cured properly before carrying on the test (Table 2).
| System | Time |
| Rubber-based systems | 1-72 hrs |
| Acrylic-based systems | 48 hrs for total system |
| Polyurethane systems | 24-72 hrs |
| Cementitious systems | 1-2 hrs and flood test within 24 hrs |
Table 2: Curing Time